Table of Contents
- Why Pipes Freeze and Burst in Winter
- How to Identify a Frozen or Burst Pipe
- What to Do When Frozen Pipes Burst
- Step 1: Get everyone out of the flooded area
- Step 2: Shut off the electricity, only from a dry, safe location
- Step 3: Shut off the main water supply
- Step 4: Drain the lines and relieve pressure
- Step 5: Contain the water
- Step 6: Document before you clean
- Step 7: Call for help
- When to leave the building entirely
- How to Shut Off Water to a Burst Pipe
- How to Unfreeze Water Pipes Safely
- Temporary Burst Pipe Repair Options
- Water Damage Cleanup and Next Steps
- Preventing Frozen Pipes Before Winter
- Frequently Asked Questions
Last Updated: October 5, 2026
Why Pipes Freeze and Burst in Winter
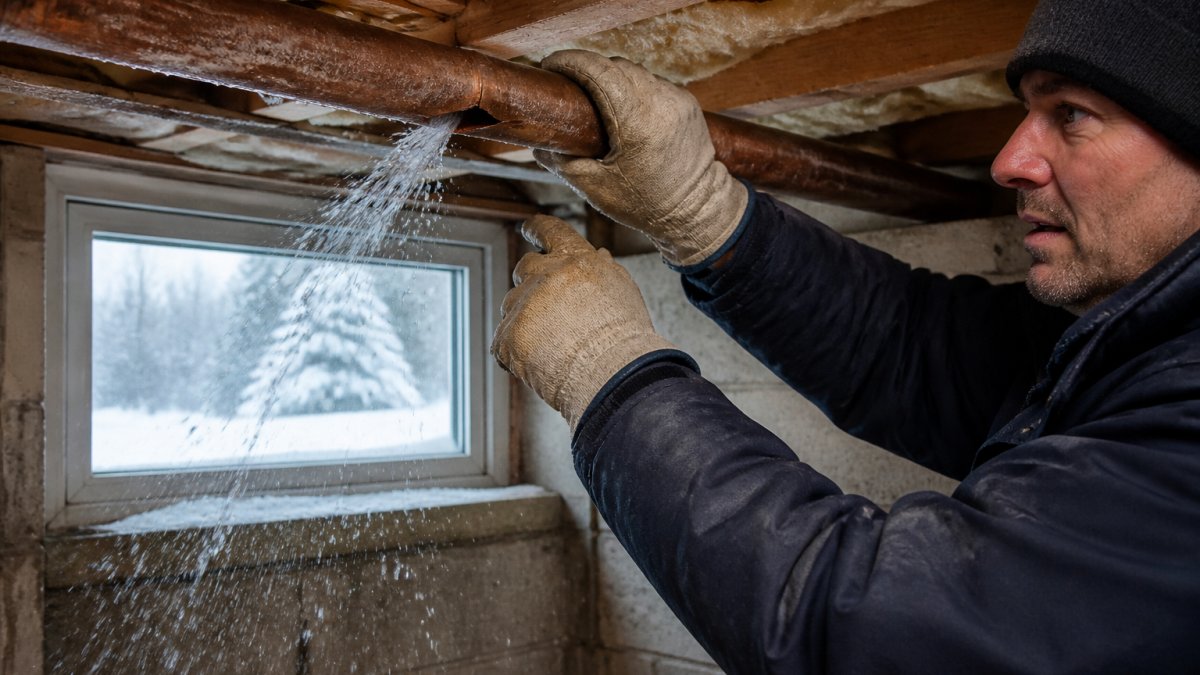
Water expands as it freezes, building pressure until the pipe ruptures and floods your home, a burst pipe winter hazard that strikes when temperatures drop.
Exposed pipes freeze fastest; attics, crawl spaces, basements, and exterior walls are most vulnerable. Outdoor faucets and hose bibs freeze first, but indoor pipes near unheated areas or poorly insulated exterior walls can freeze too.
The danger isn’t just the frozen section: once a pipe freezes solid, pressure builds upstream and can crack it before you notice ice. When the ice melts, water pours out.
Prevention is always cheaper than emergency repairs.
How to Identify a Frozen or Burst Pipe
A frozen pipe’s first sign is reduced water pressure, a trickle instead of a full stream.
Listen for banging, clanking, hissing, or whistling as water tries to flow through ice.
A burst pipe is more obvious: active leaking, with water pooling on floors, dripping from ceilings, or running down walls where the frozen section cracked.
To confirm a burst pipe, turn off all faucets and appliances; if the meter keeps moving, water is leaking.
Look for visible cracks or splits in exposed pipes. Ice buildup, frost, or condensation on a pipe signals freezing.
What to Do When Frozen Pipes Burst
A burst pipe releases water fast, often several liters per minute on a pressurized line. Order matters: wading through a flooded room to reach the shutoff can turn a plumbing emergency into an electrical one. Work through the steps below in order and skip any you cannot complete safely.
Step 1: Get everyone out of the flooded area
Move people and pets out of any room with standing water first. Water plus electricity is the real danger; if water is dripping near a ceiling light, outlet, appliance, or panel, treat the area as energized until you know otherwise.
Step 2: Shut off the electricity, only from a dry, safe location
If you can reach your electrical panel without walking through standing water, switch off the circuits serving the flooded area. If the panel is in a wet basement or the floor to it is flooded, stay away. Call your utility’s emergency line and leave until they confirm it is safe. Never stand in water and touch a panel, breaker, or appliance.
If you see a bulging ceiling, a sagging drywall seam, or water pooling above a light fixture, leave the room. A ceiling holding trapped water can collapse without warning. Do not poke or drill it to drain it yourself.
Step 3: Shut off the main water supply
Close the main shutoff valve (see the next section) to stop new water entering the system. On a hot-water line burst, also turn off the water heater at its breaker or gas valve so it does not run dry and overheat.
Step 4: Drain the lines and relieve pressure
Open every faucet, starting with the lowest fixture (basement sink or laundry tub) and finishing with the highest, to drain residual water and prevent a vacuum from holding water in the lines. Flush toilets once and leave faucets open until repairs are complete.
Step 5: Contain the water
Use towels, buckets, and a wet/dry vacuum to stop water spreading into adjoining rooms. Direct water toward a floor drain if one is below the leak, block doorways with rolled towels, and move furniture, electronics, and porous items off the wet floor.
Step 6: Document before you clean
Photograph and video the burst pipe, the water line on walls, and every damaged item before moving or discarding anything. Note when you discovered the leak and shut the water off. Insurers want the damage in its original state, and receipts for emergency supplies or temporary repairs support the claim.
Step 7: Call for help
Call a licensed plumber for the pipe repair and, if flooding is significant, a water-damage restoration company for extraction and drying. Report the loss to your insurer promptly; most policies require it, and delay can complicate the claim.
The sequence is: people out, power off (only if safe), water off, lines drained, water contained, damage documented, then professionals called. Doing these out of order is how a manageable leak becomes a structural or electrical claim.
When to leave the building entirely
Evacuate and call for emergency help if you cannot reach the electrical panel safely, the ceiling is bulging or sagging, you smell burning near wet wiring, or water is rising faster than you can contain it. No pipe repair is worth a fall through a saturated ceiling or a shock from an energized floor.
How to Shut Off Water to a Burst Pipe
Every home has a main water shutoff valve; find it before winter arrives. Most are near the water meter, in the basement, crawl space, or mechanical room.
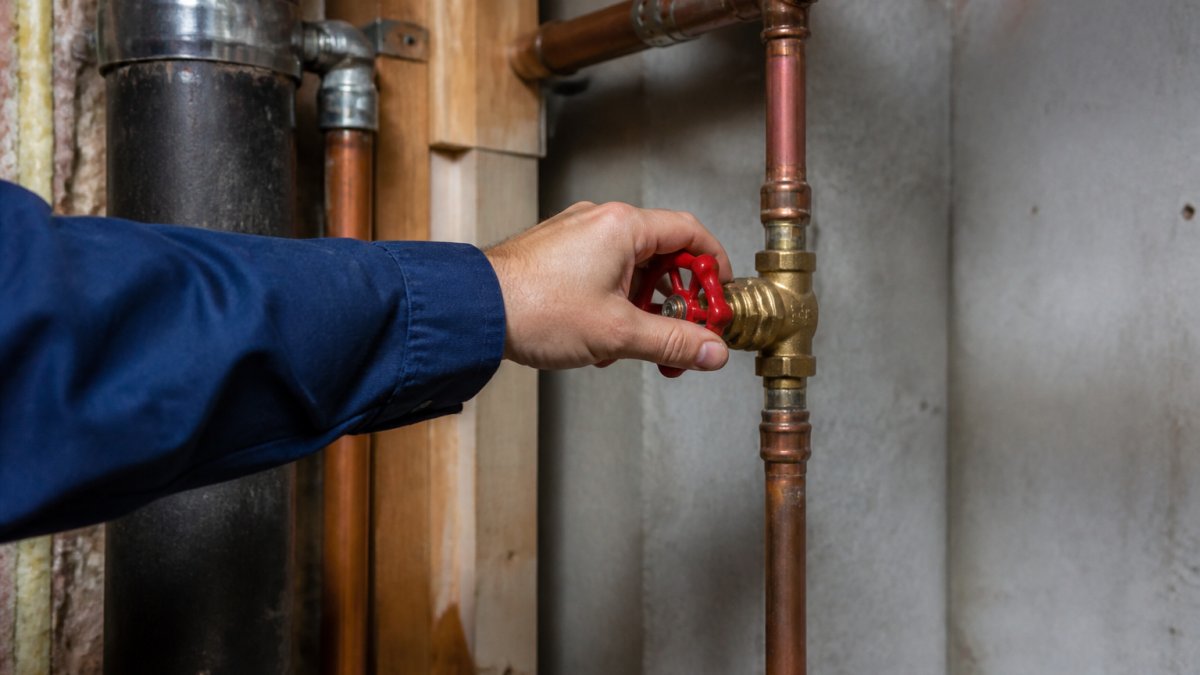
The valve is usually a round handle or lever. Turn it clockwise until the handle stops, a quarter turn on some valves, a full rotation on others.
If the main valve is stuck or you can’t find it, call Spencer4Hire Plumbing immediately.
Leave these faucets open until the plumber arrives so all water drains from the system.
How to Unfreeze Water Pipes Safely
Safe thawing uses gentle, consistent heat. A heat lamp at least 30 cm from the frozen section warms the pipe gradually over 30 minutes.
Hot towels wrapped around the pipe provide gentle warmth.
Increase air circulation: open cabinet doors under frozen pipes and direct fans at the frozen area. Gradual warming is safer than direct heat.
Never thaw a pipe that is actively leaking; a burst pipe leaks faster as the ice melts.
Heat tape wrapped around the pipe provides steady warmth. Plug it in for several hours and check periodically for returning water flow.
Temporary Burst Pipe Repair Options
A temporary repair has one job: stop or slow the leak until a plumber makes a permanent fix. None of these options are permanent or trustworthy on a pressurized line for more than a day or two. The right choice depends on the pipe material, the size and shape of the failure, and whether the line is under pressure.
Match the repair to the failure
| Failure type | Best temporary option | Why |
|---|---|---|
| Pinhole leak | Rubber patch + hose clamp, or self-fusing silicone tape | Small, round opening seals well under compression |
| Hairline crack along the pipe | Repair sleeve or pipe clamp with rubber pad | Spreads the clamping force along the crack |
| Split or large rupture | Push-fit coupling (if pipe is clean and round) or full section replacement by a plumber | Patches cannot bridge a wide opening |
| Leak at a joint or fitting | Plumber’s epoxy putty, then clamp | Putty fills irregular gaps a flat patch cannot |
| Frozen-but-intact pipe | Do not patch, thaw it (see the thawing section) | No repair is needed until it actually splits |
The main temporary options, and their limits
Pipe clamp with rubber pad. Best for hairline cracks and pinholes on copper or galvanized steel.
Self-fusing silicone tape. Bonds to itself, not the pipe, so it works on wet or damp surfaces where ordinary tape fails.
Plumber’s epoxy putty. Cures hard and works on irregular shapes like fittings and joints. The pipe must be dry to bond; dry it with a cloth and let it sit a few minutes.
Repair sleeve or clamp-on sleeve. A metal or plastic sleeve with a rubber gasket that wraps the pipe.
Push-fit coupling. A mechanical fitting that grips and seals onto a clean, round pipe end, the closest thing to a semi-permanent field repair.
Never use a temporary patch on a pipe you cannot see or reach safely, on a line behind a wall, or on a gas line. If the leak is inside a wall or ceiling cavity, shut the water off and wait for a plumber; patching blind risks a hidden failure that floods the cavity later.
When a temporary repair is the wrong call
Skip the patch and call a plumber immediately if:
- The pipe is split along its length or has separated at a joint.
- The leak is behind a wall, under a slab, or in a ceiling cavity.
- The pipe is polybutylene or older galvanized steel that is corroded and brittle.
- Water is spraying rather than dripping; that indicates full line pressure and a patch will not hold.
- You cannot safely reach the pipe or shut off the water first.
After the temporary fix
Keep the water off if you can, or reopen the main valve slowly and watch the patch for weeping, with a bucket and towel underneath. Note when you applied it so you can tell the plumber how long it held. A permanent repair means cutting out the damaged section and replacing it with new pipe of the same material, a plumber’s job, not a patch’s.
Water Damage Cleanup and Next Steps
After shutting off the water and calling a plumber, focus on damage control. Remove standing water with a wet vacuum or mop.
Open windows and doors, turn on ceiling fans, and run dehumidifiers or air conditioning to dry the space faster.
Remove wet insulation, drywall, and flooring if possible. These materials trap moisture and develop mold. Pull up wet carpet. Remove wet drywall sections.
Dry wood framing and subfloors with fans pointed directly at wet wood and dehumidifiers running continuously until moisture is gone.
Contact your homeowner’s insurance company to report the burst pipe and water damage and ask about coverage for repair and restoration. Insurance typically covers sudden, accidental water damage from burst pipes (Insurance for unexpected events and disasters).
Get written quotes from restoration companies. Water damage restoration is specialized work: professional crews remove water, dry the space, and prevent mold, different from plumbing repair.
Preventing Frozen Pipes Before Winter
Prevention is far cheaper than fixing a burst pipe. Start in fall before freezing temperatures arrive.
Seal cracks and holes in exterior walls near pipes: caulk gaps where pipes pass through walls and weatherstrip doors and windows.
Keep cabinet doors open under sinks on exterior walls so warm room air circulates around the pipes and prevents freezing.
Maintain indoor temperature above freezing at all times.
Let faucets drip slightly during extreme cold. Moving water freezes slower than still water.
Install pipe insulation on all exposed plumbing; the single most effective prevention measure.
Have a licensed plumber inspect your system before winter.
Frozen and burst pipes cause thousands of dollars in water damage every winter. The emergency happens fast, but you can respond quickly by knowing where your main shutoff valve is and having a trusted plumber’s number ready.
Frequently Asked Questions
What should I do first when a pipe bursts in winter?
Shut off the main water supply immediately to stop water flow and prevent further damage. Locate your main shutoff valve, usually in the basement or crawl space. Turn it clockwise until it stops. If you cannot reach it or it won’t turn, call a licensed plumber right away. Once water is off, open all faucets to drain remaining water from the pipes and reduce pressure on the burst section.
How do I shut off water to a burst pipe safely?
Find your main shutoff valve and turn it clockwise with steady pressure. If the valve is stuck or corroded, do not force it; call a professional plumber instead. After shutting off the main supply, open all indoor and outdoor faucets to release trapped water and air. If the burst is in a specific section, you may isolate that area by closing a local shutoff valve if one exists, but always shut off the main supply first to control the emergency.
Can I repair a burst pipe myself, or should I call a plumber?
Minor leaks in accessible pipes may be temporarily patched with epoxy putty or a pipe repair clamp while you arrange professional help. However, a full burst pipe replacement requires cutting out the damaged section and installing new pipe material, a job that demands proper tools, fitting knowledge, and pressure testing. Licensed plumbers ensure repairs meet code and prevent future failures. For safety and a lasting fix, professional repair is strongly recommended, especially in winter when temporary solutions are more likely to fail.
How do I unfreeze water pipes safely?
Use gentle, indirect heat: wrap frozen pipes with hot towels, apply a heat lamp from a safe distance, or direct warm air from a hair dryer along the pipe. Never use a blowtorch, open flame, or extreme heat, which can damage pipes or create fire hazards. Start thawing from the faucet end and work toward the blockage. If you cannot access the frozen section, or if thawing creates a leak, stop immediately and contact a licensed plumber. Some frozen pipes should not be thawed by homeowners; call a professional if the pipe is in a wall, attic, or near electrical wiring.