Table of Contents
- What You’ll Need Before You Start
- Step 1: Identify At-Risk Pipes and Signs of Frozen Pipes in Walls
- Step 2: Insulate Exposed Pipes with the Right Pipe Insulation Materials for Winter
- Step 3: Manage Your Thermostat and Water Flow
- Step 4: Winterize Outdoor Water Supplies
- How to Thaw Frozen Pipes Safely
- Smart Monitoring and Long-Term Retrofitting
- Common Mistakes to Avoid
- Frequently Asked Questions
Last Updated: September 28, 2026
What You’ll Need Before You Start
To prevent pipe freezing, start with a few basic supplies and one important habit: knowing where your water shut-off valve is before you need it. Five minutes of prep now saves thousands in water damage later.
Gather these items before the first cold snap:
- Foam pipe insulation sleeves or fiberglass wrap
- Heat tape or a plug-in heating cable
- A pipe sleeve or foam tape for tight corners
- A space heater for temporary use only
- A wrench for your main water valve
- A towel and bucket for small drips
Step 1: Identify At-Risk Pipes and Signs of Frozen Pipes in Walls
The pipes most likely to freeze sit against outside walls, in basements, attics, and crawl spaces. These spots get the least heat and the most cold air.
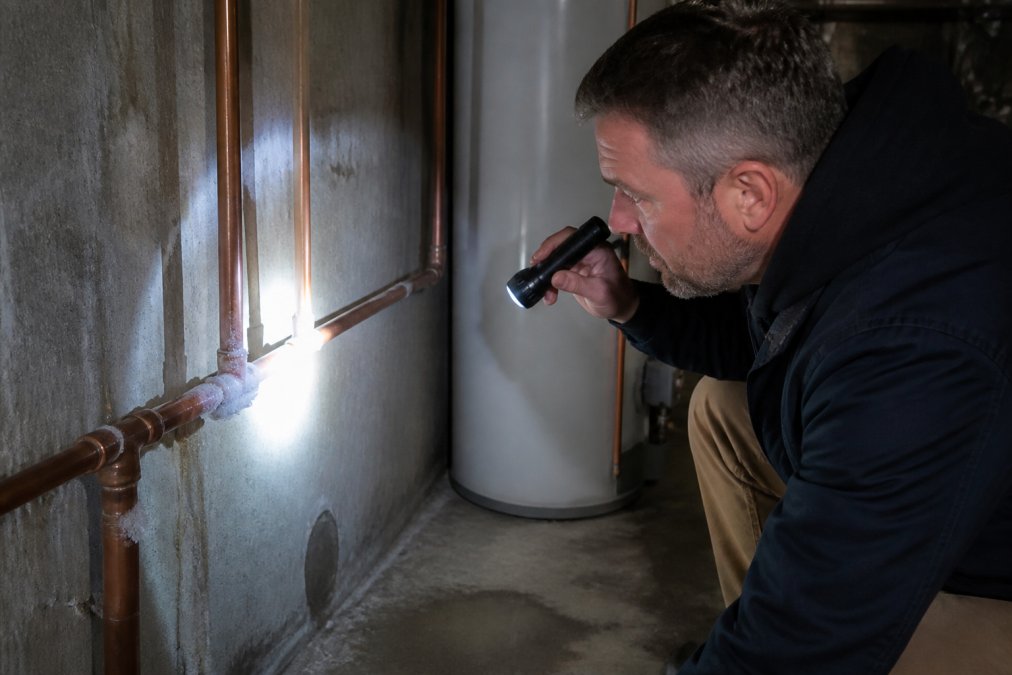
Common locations for vulnerable pipes
- Basements and crawl spaces near exterior walls
- Attics where insulation is thin
- Pipes under kitchen and bathroom sinks on outside walls
- Garages and unheated additions
- Outdoor spigots and hose bibs
Early warning signs to watch for
Signs of frozen pipes in walls often show up before a pipe bursts. Watch for frost on the pipe surface, a toilet that won’t refill, or a faucet that gives only a trickle. You may also hear a faint banging or gurgling when you turn on the tap. If you spot these, act fast. A frozen section can turn into a pipe rupture within hours.
Step 2: Insulate Exposed Pipes with the Right Pipe Insulation Materials for Winter
Insulation slows heat loss; it does not add heat. That distinction decides which product you need. On a pipe in a heated basement, insulation traps the warmth the pipe already has. On a pipe in a crawl space that sits below freezing for weeks, insulation alone just slows the inevitable, you need a heat source inside the insulation.
Comparing foam, fiberglass, and heat tape options
| Material | Best For | Watch Out For |
|---|---|---|
| Foam sleeve | Straight runs, easy DIY | Cracks over time; must match pipe diameter |
| Fiberglass wrap | Odd shapes, tight corners, valves | Needs gloves; compresses if over-wrapped |
| Rubber elastomeric | Condensation-prone runs, tight bends | Pricier per foot than foam |
| Heat tape (self-regulating) | Pipes in unheated areas | Requires power; must be rated for the pipe |
| Heat cable with thermostat | Long runs, crawl spaces | Higher upfront cost; needs a circuit |
Sizing and installation that actually works
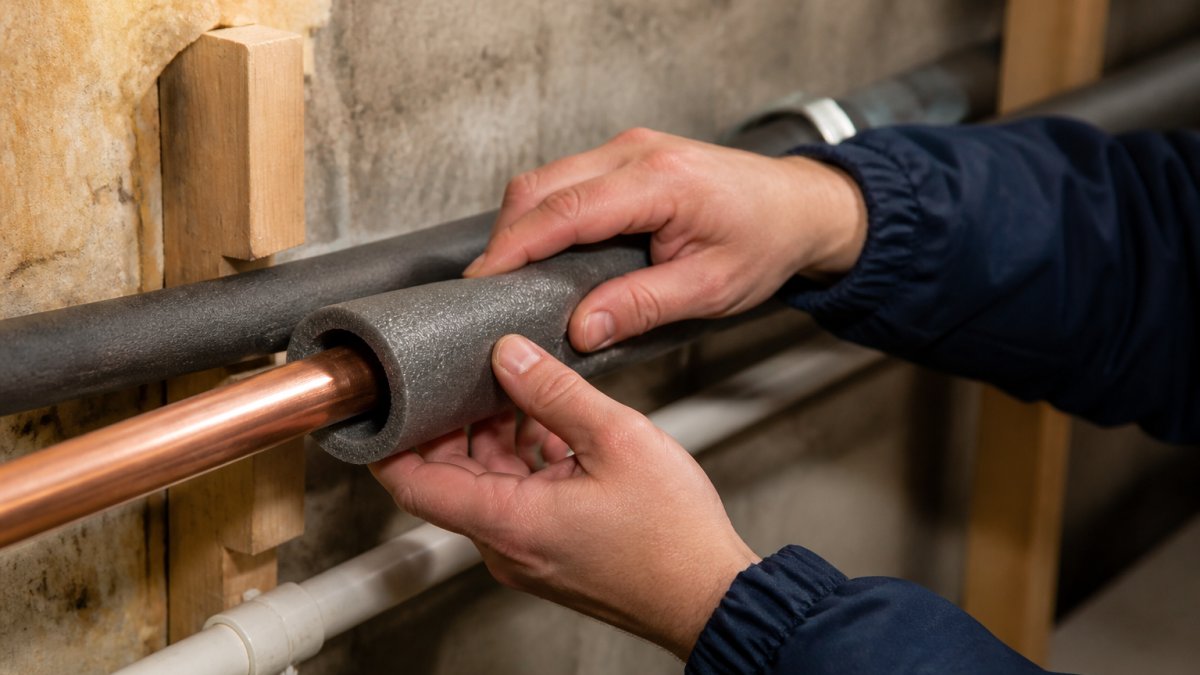
- Match the inner diameter to the pipe. A foam sleeve that is too loose leaves an air gap that cold air circulates through; too tight and it tears. Measure the outside diameter of the pipe, not the nominal size.
- Seal the seams. Foam sleeves split lengthwise. Run a bead of acrylic or foil tape along the seam and at every joint. Unsealed seams are where cold air gets in.
- Insulate the fittings too. Elbows, tees, and valves are the most common freeze points because they interrupt the insulation. Use pre-cut fitting covers or wrap them with fiberglass.
- Leave the thermostat and valve handles accessible. Do not bury a shut-off valve under insulation you have to cut away in an emergency.
Choosing and installing heat tape
- Check the rating. Look for a tape rated for the pipe material and for indoor or outdoor use as appropriate. A tape rated for metal pipe may not be rated for plastic.
- Run it along the bottom of the pipe. Cold air settles, so the lower half of the pipe is where freezing starts. Tape along the bottom, then insulate over it.
- Spiral, do not run straight. A spiral spreads warmth evenly and avoids a hot spot that can damage the pipe.
- Plug into a GFCI outlet. Any electrical device in a basement, crawl space, or near water should be on a ground-fault circuit interrupter.
- Use a thermostat or controller. A plug-in thermostat turns the tape on only when the pipe temperature drops, which saves power and extends the tape’s life.
Wrap heat tape in a spiral, not straight along the pipe. A spiral spreads warmth evenly and lowers the chance of a hot spot that can damage the pipe.
Never install heat tape on a pipe you have already thawed with an open flame, and never overlap constant-wattage tape. Both create a fire risk that insulation will hide until it is too late.
If a run is long, inaccessible, or already shows signs of repeated freezing, insulation and tape are a patch. A plumber can assess whether the run should be rerouted or the space heated instead.
Step 3: Manage Your Thermostat and Water Flow
Set your thermostat to at least 12°C, day and night, even when you’re away. A lower setting sounds thrifty, but the repair bill for a burst pipe dwarfs any heating savings.
Trickle faucets and cabinet circulation
Let a faucet trickle on the coldest nights. Moving water freezes far slower than still water. Open cabinet doors under sinks on outside walls so warm air can reach the pipes. This simple step keeps the ambient temperature around the plumbing above freezing.
A steady trickle and open cabinet doors cost a few cents a night. A pipe burst can cost thousands in water damage and repairs.
Step 4: Winterize Outdoor Water Supplies
Shut off and drain outdoor water supplies before the first hard freeze. Close the indoor valve that feeds your outdoor spigot, then open the spigot outside to let any trapped water drain out. Disconnect and store every garden hose. A hose left connected traps water in the line and can crack the spigot when it freezes.
How to Thaw Frozen Pipes Safely
Thawing a frozen pipe safely means warming it slowly, never with an open flame. Start by opening the nearest faucet so melting water has somewhere to go. Then warm the pipe with a hair dryer, a space heater, or a towel soaked in warm water. Work from the faucet end back toward the frozen section.
Smart Monitoring and Long-Term Retrofitting
Most guides stop at foam sleeves and a dripping tap. Two upgrades go further: electronic monitoring that warns you before water escapes, and permanent fixes that remove the freeze risk instead of managing it every winter.
Smart leak detection and automatic shut-off
A Wi-Fi leak sensor is a small puck you place on the floor near the water heater, under a sink on an outside wall, or beside the basement laundry pair. When moisture bridges its contacts, it pushes an alert to your phone. Models that pair with a motorized ball valve on your main line can close the valve automatically, capping the damage at whatever water is already in the pipes.
What to look for:
- Sensing type. Point sensors detect a puddle at one spot. Rope or cable sensors detect moisture anywhere along a run, which suits a long basement wall or a crawl space.
- Shut-off valve compatibility. The sensor is only half the system. Confirm the valve actuator matches your main line diameter and that the unit fails safe, valve closed, if power or Wi-Fi drops.
- Temperature sensing. Some hubs also report ambient temperature, so you get a warning when a mechanical room or garage dips toward freezing, not just after a leak starts.
- Local alarm vs. cloud alert. A local siren helps if you are home; a cloud alert helps if you are not. The best setups do both.
Matching the fix to the pipe material
Different materials fail differently when they freeze, and that changes both the prevention priority and the repair bill.
- Copper. Rigid and a good conductor of cold. Copper splits along the wall of the pipe and the split can be hairline, so a thawed copper line may weep rather than spray. Repair usually means cutting out the split section and soldering or pressing in a coupling.
- PEX. Flexible and slightly more forgiving because it can expand and recover, but fittings and crimp rings are the weak points. A frozen PEX run often survives while the connection at the end fails. Repair is a cut-and-replace with new rings.
- PVC and CPVC. Common on drain lines and some supply runs. PVC becomes brittle in cold and can shatter rather than split, sending fragments downstream. Repair is a solvent-welded coupling.
- Galvanized steel. Older homes carry this. It freezes faster than copper in the same conditions and corrodes from the inside, so the interior diameter shrinks over time and the pipe is already closer to blocked. A frozen galvanized line is often the trigger for a full repipe rather than a spot repair.
Permanent retrofitting options
Temporary measures buy you a winter. These solve the problem:
- Reroute the run. Moving a supply line from an exterior wall cavity into an interior wall or a heated soffit removes it from the freeze zone entirely. This is the most reliable fix and the most disruptive.
- Add wall insulation and air sealing. Insulating the exterior wall cavity behind a pipe, and sealing the rim joist and any penetrations where cold air enters, raises the temperature the pipe sits in. Air sealing often matters more than adding batts.
- Heat the space. A small, thermostatically controlled heater in a crawl space or unheated addition keeps the ambient temperature above freezing without heating the whole house.
- Redundant shut-off. A second valve on the branch that feeds the at-risk zone lets you isolate it and drain it if you leave for an extended period.
Monitoring tells you when something is wrong. Retrofitting makes sure it stops happening. If a pipe has frozen more than once, the fix is structural, not another layer of foam.
Common Mistakes to Avoid
The biggest mistake is leaving a house unheated during a cold snap. Even a weekend away at 5°C can freeze pipes in an unheated zone.
Other common errors:
- Closing cabinet doors before the cold passes
- Forgetting to disconnect garden hoses
- Skipping insulation on basement pipes because “it never froze before”
- Using a blowtorch to thaw a line
- Ignoring a slow drain or weak water pressure, which can signal a partial freeze
Frequently Asked Questions
At what temperature do pipes typically freeze?
Pipes are at risk when the ambient temperature around them drops below freezing, usually around -6°C or lower. However, wind chill, poor insulation, and exposed locations can cause freezing at slightly higher temperatures. The best ways to prevent pipe freezing include keeping your thermostat at a consistent setting and insulating vulnerable pipes before sub-freezing temperatures arrive.
Should I leave my taps dripping to prevent frozen pipes?
Yes, allowing a trickle of water to flow through faucets on exterior walls can help prevent freezing. Moving water freezes more slowly than standing water, and the slight pressure release reduces the risk of a pipe burst. This is one of the best ways to prevent pipe freezing during extreme cold snaps, especially for pipes in cabinets or along exterior walls.
What are the signs of frozen pipes in walls?
Common signs of frozen pipes in walls include reduced water pressure, frost on exposed pipe surfaces, strange odors, and visible condensation. If you turn on a faucet and only a thin stream comes out, the pipe may be partially frozen. Addressing these signs early with safe thawing methods can prevent a pipe rupture and costly water damage.
How do I insulate exposed pipes in my basement or crawlspace?
Use foam pipe sleeves, fiberglass wrap, or heat tape designed for pipe insulation materials for winter. Measure the pipe diameter, cut the insulation to length, and secure it with tape or zip ties. For pipes in unheated areas, combine foam insulation with heat cable for added protection. Ensure all joints and elbows are covered to prevent cold spots.
Frozen pipes are one of the most preventable plumbing problems, but they need action before the temperature drops, not after. If you’d rather not gamble on a DIY fix, Spencer4Hire Plumbing offers licensed and insured plumbers, true 24/7 emergency service, and clear quotes with no hidden fees. Our team can inspect your pipes, install insulation, and handle repiping for older homes. Get started with Spencer4Hire Plumbing and stop worrying about the next cold snap.